

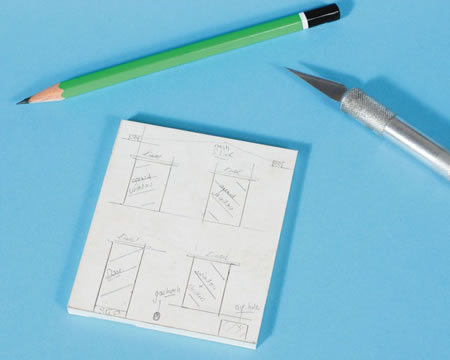
miniature building construction in foamboardby Emmanuel Nouaillier
Emmanuel Nouaillier shows how to scratch build and age miniature structures. This is will introduce my personal approach and techniques for scratch building and ageing buildings, pertaining to the typical northern French urban landscape of the 1940s and early 50s.
I believe that a proper rendition of textures and adequate weathering of the different elements is important when making a miniature scene, where the optimal development of each small detail of a diorama becomes more a necessity to modellers who want to show, with utmost realism, models that are better detailed and weathered I will explain stage by stage in future articles how to create peculiar materials and elements and how to give the models ‘life’ while employing generic methods.
I believe that a proper rendition of textures and adequate weathering of the different elements is important when making a miniature scene, where the optimal development of each small detail of a diorama becomes more a necessity to modellers who want to show, with utmost realism, models that are better detailed and weathered I will explain stage by stage in future articles how to create peculiar materials and elements and how to give the models ‘life’ while employing generic methods.
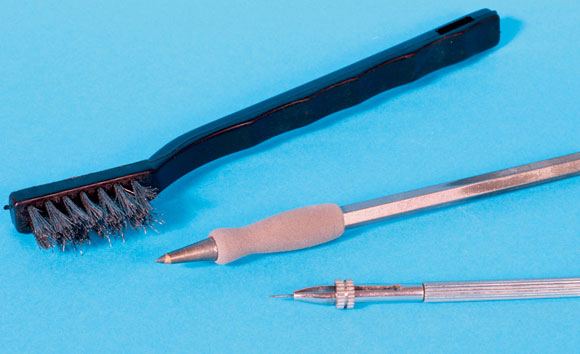
Some of the ‘basic’ tools that I use to work the foam and give it some aspects and different alterations in scale. The fine wire brush is used to produce a good looking surface finish in particular cases.
To emboss bricks or cobblestones into the foam, I’ve made tools from old paintbrushes with no more bristles left, and shaped the ferrules into the form desired with fine pointed pliers.
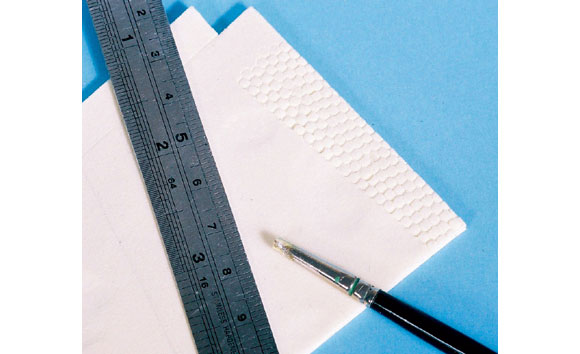
Peeling off the outer card of Feather Board will be very interesting for the modeller who wants to create his own brick wall, concrete surface or cobbled street.
For cobblestones and stone sets, pressing one of the tools into the foam individually reproduces the stones. If you wish, you can stamp with deeper cuts for deeper joints, carve off missing bricks or reproduce holes with the point of a needle.
Creating a cobbled street with its typical dips, displaced cobbles and uneven surface will be easy by employing this technique. Here you can see a part of a street in 1:72 scale in the course of being worked.
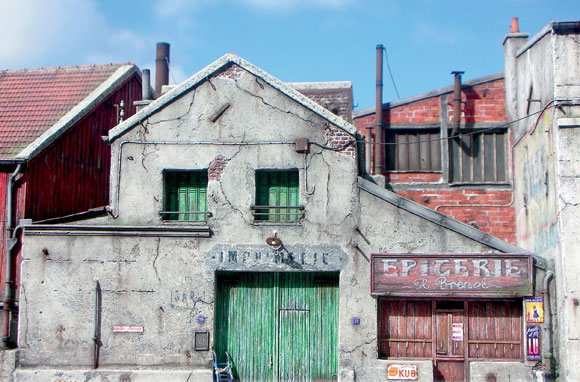
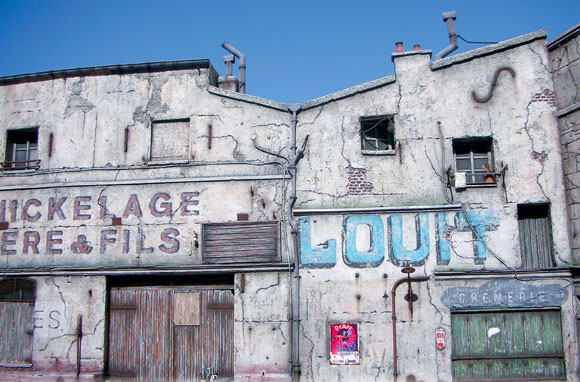
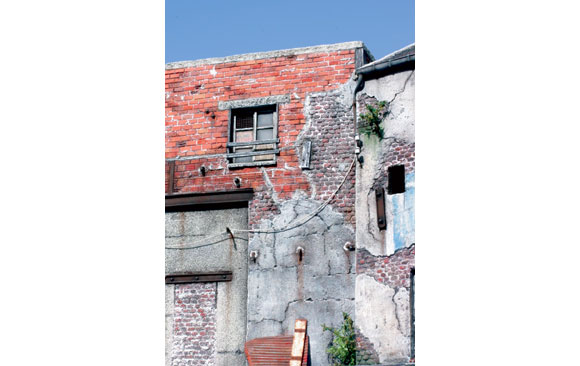
In order to set my modelling efforts into context, I think it would be useful to give you some background which should help you understand the reasons for the choice of proceeding outside the normal presentation of ‘military modelling’, as it’s habitually practiced, where armoured vehicles are introduced in the middle of ruins - sometimes very realistic, but often showing kits of houses, buildings, that are ready to build and paint. My approach is different.
Inspired by the wish to capture ‘atmosphere’ in miniature, I have always made dioramas that in the course of the time have revealed an artistic approach. Having spent a long time with general military modelling and then turning to figures for a while, I decided a few years ago to make my first diorama that had as its only topic a very shaded, old urban and industrial ambience. Applying the methods of painting and ageing I’d learnt, and building the scenes for their ‘visual aspect’, my only fixed idea was to be very close to reality as possible in the effects of decay and deterioration of building materials and all this in 1: 8 and 1:72 scales. I have come a long way since that first experience and I have also discovered the possibilities offered by some unknown, or rather lesser known, materials for creating many desired elements on which I like to simulate ageing effects and create an overall drab aspect.
Generally, to create miniature buildings I have relied upon four main materials: feather board (polyurethane foam sandwiched between two sheets of card), Forex (a light expanded PVC), coating and plastic card.
Applying a layer of coating onto foam to simulate the façades of particular buildings will perfectly convey the decay and the state of degeneration.
Scribing brick bonds in plaster onto Forex can be a tedious work, but it produces the textures that will help to create typical buildings or parts of them. As for the red bricks, some realistic alterations and additions will be added by engraving.
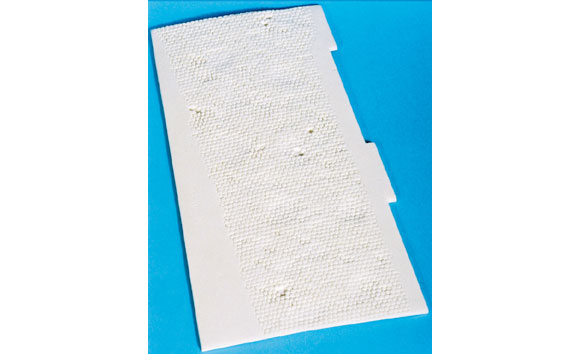
feather board
|
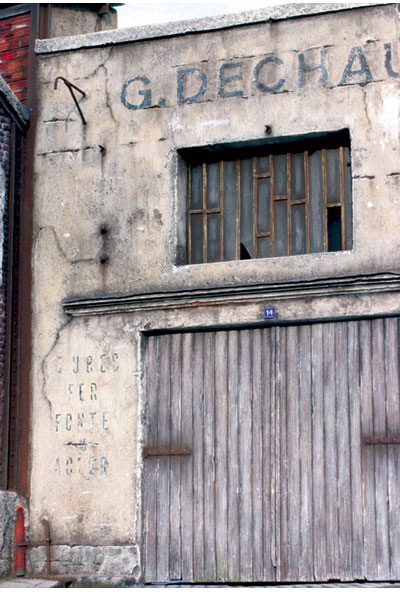
Feather Board is made with a central core of polyurethane foam between two layers of thin card. It is perfectly flat, even over large areas (one metre square) and very light. It is available in various thickness (3mm, 5mm and10mm) and I get mine from Zebulon. The foam core is compatible with all sorts of adhesives as well as all paints that we use for modelling. Used as it comes, this material is perfectly suited for creating the basic shell of a building, then you can glue embossed plastic sheets or card onto it, or apply a layers or coats of plaster to simulate the façades of particular urban buildings or any specific decorative features.
Embossing can take a long time, especially if one undertakes to reproduce large brick buildings. This finished example is a part of the façade of an industrial warehouse.
There is another less-known, yet very interesting method, which involves peeling off the outer card. Thanks to the nature of the foam, it can be scribed, worked, embossed with the aid of hand-made punches, ‘matrixes’ or ordinary tools such as scribers, blunt scalpel blades, points of needles, fine wire brushes, etc. Thus it’s possible to obtain all sorts of effects and to make cobbled streets, brickwork, concrete, and stones, as required, to reproduce streets, pavements and all sorts of façades and buildings.
In addition to this, the nature of the foam is well-suited to imitating the surface of the brick, the finish of the stone, or the texture of concrete. Furthermore, for a cobbled street you are able to reproduce the worn patches caused by road traffic by simple depressions in the foam, or to imitate cracks in brick walls due to stress, and breakage of the rendering between the bricks.
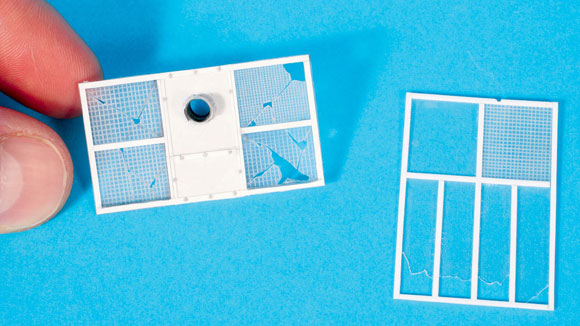
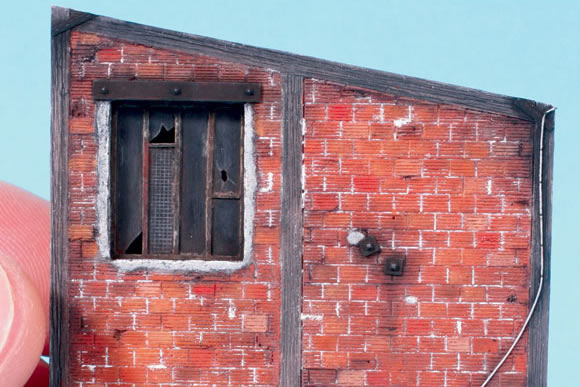
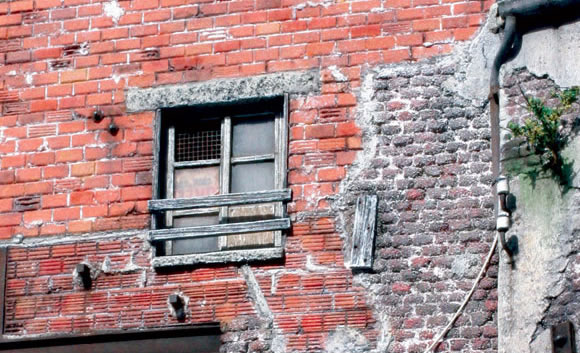
Using plastic card to reproduce all sorts of features is well-known to us modellers, especially to improve vehicle kits. There are also numerous applications for plastic card in the urban landscape as seen here. These metal framed windows with broken glass panes in 1:48 scale were made to fit into the façade of an old factory.
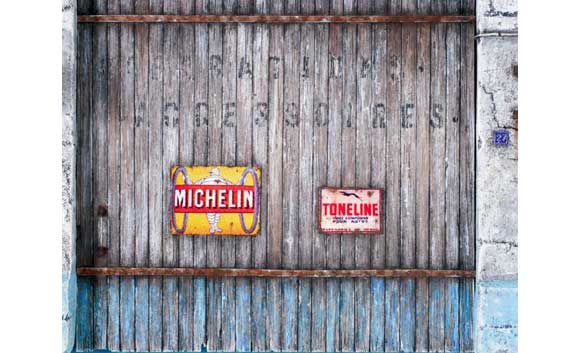
Scribing onto plastic card will allow you to create doors with the appearance of decay and dilapidation by performing some incisions or engraving some of the joints a little deeper…Like this old garage door I made in 1:48 scale.
Here’s part of a concrete yard in 1:72 scale in the course of being worked. Fissures and joints are made with an engraving point and the point of a needle. An attractive surface finish will be later given with a fine wire brush. The surface after painting and ageing where the porous texture of the foam is wholly adapted to represent this kind of material. Details such as sewer hatch covers, manhole and other small covers, etc., are treated with pigments and graphite powder to enhance their surface finishes.
Forex
|
Forex may be an unfamiliar product to most modellers. It is a lightly expanded PVC and comes in sheets, which are perfectly flat. It is used principally for shop fitting, but can be very useful for modelling purposes, notably thanks to its surface finish, which is less smooth than plastic and slightly softer. Like feather board it can be obtained in various thicknesses; 1/2/3/4/5mm and like feather board this material is easy to glue with contact adhesive or cyanoacrylate and used in this way Forex is also ideal for reproducing basic shells. I use Forex for reproducing very precise construction materials, whether scribing it with tools or using it without any form of specific treatment (architectural details where the natural ‘finish’ of the product makes it suitable for imitating window sills or cement rendered façades. In addition to these applications, the material can be scribed and shaped, which should appeal to the modeller who wants to reproduce certain types of brick bonds in plaster, but the possibilities are evidently and not just limited to the simulation of this type of brickwork.
Plastic card and ‘micro-painting
|
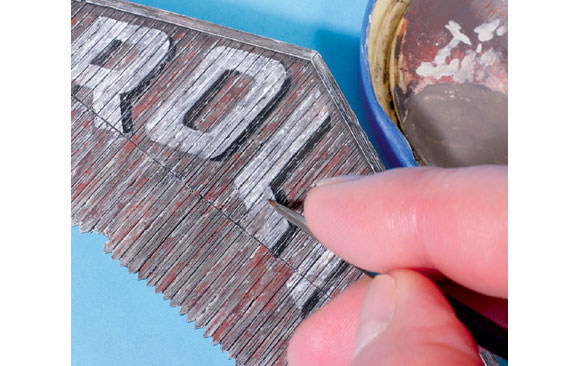
In my case, plastic card is principally employed for scratch building particular elements in urban or industrial landscapes (yard gates, doors to complete warehouses, etc.) or detailing buildings where I sometimes use Evergreen styrene sections. However, I also use plastic card for another application - scribing it to represent fine wood grain. Why? In the first place the grain of even close grained real wood is still too big and doesn’t look right when used in small scale buildings.
Other results of faded and weathered paintwork on wood with variations in the planks, different shades of colour, rotten planks and so on...
Convincing chipped paint in 1:72 scale needs some skill on the part of the modeller. Check out the result of this garage door in the course of being detailed with old metal plates.
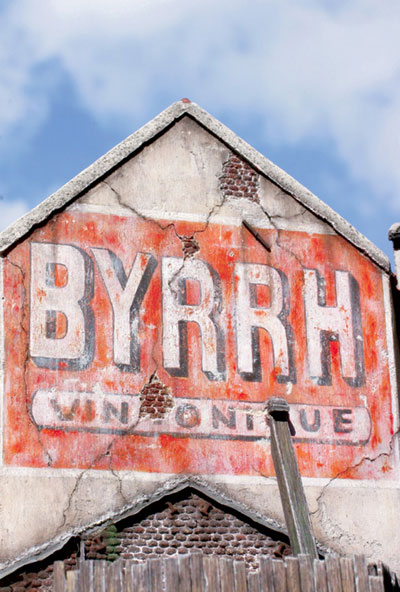
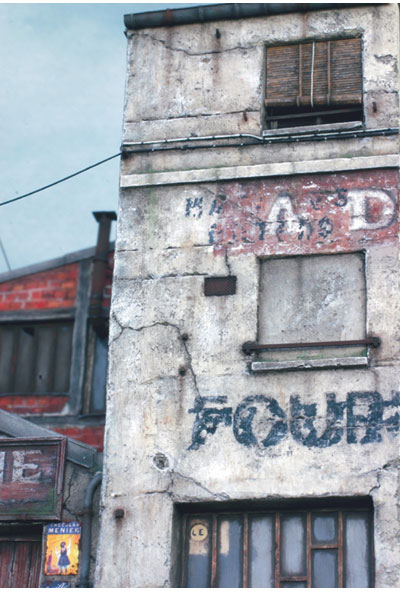
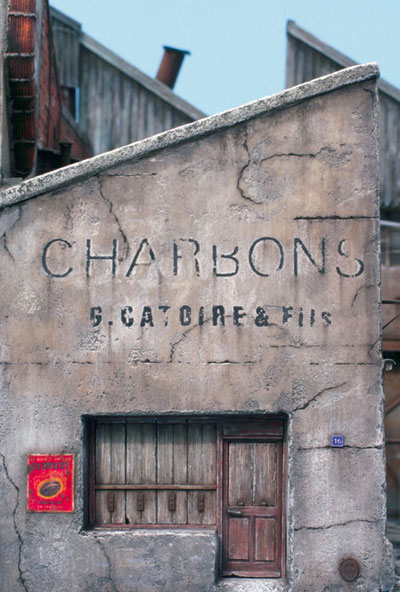
These walls seen after the painting and ageing phase clearly show the results obtained to represent a building that shows long time weathering by the elements.
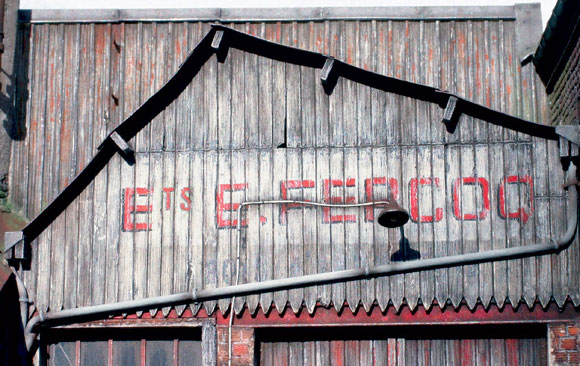
The micro-painting stage is required to reproduce the faded paint of lettering on wood cladding for extra realism, as well as the weathered paint of an old advertisement on the cracked plaster of this façade.
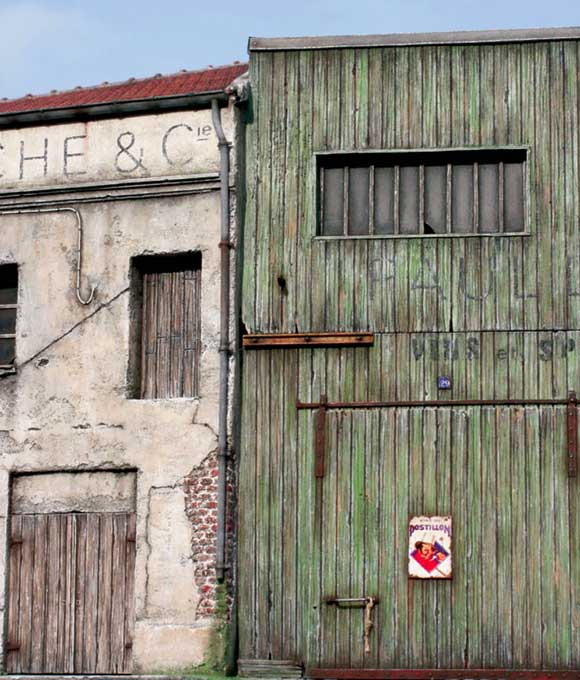
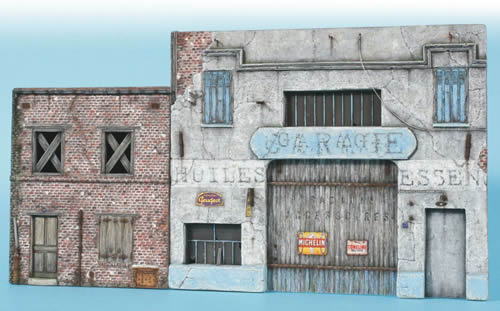
Some finished 1:72 scale façades created using foam, coating and scratch built details.
In the second place, plastic card is a material with which most of us are used to working, painting and weathering. Turning to the weathering process, the ‘micro-painting’ phase is a widely used and well known-method that will be useful on particular details and elements in the urban landscape. This technique employed only for some weathering effects or to mimic precise alterations on wood, metal, plaster, cement, etc., will add a realistic touch that makes the result different. I use it to reproduce washed paint on wooden cladding, the rusted areas of a sliding door, chipped paint of old advertisements painted on walls, the shades of decay on a façade.
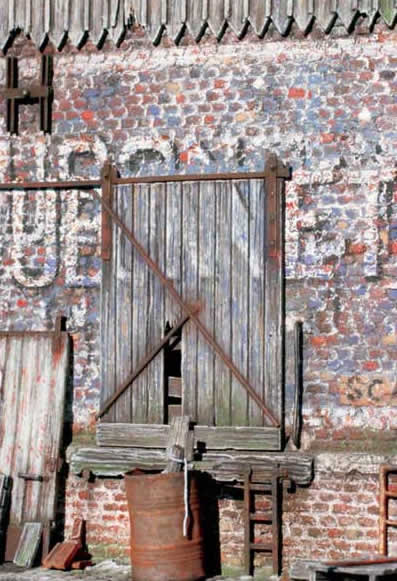
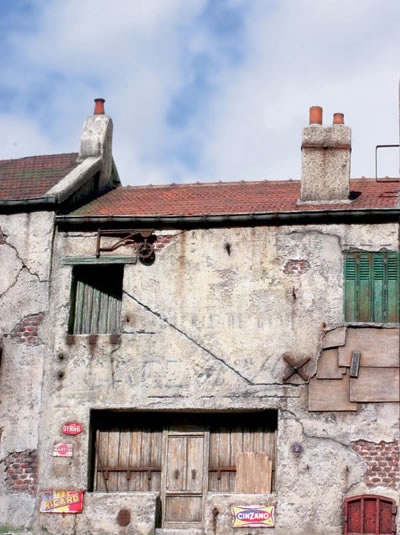
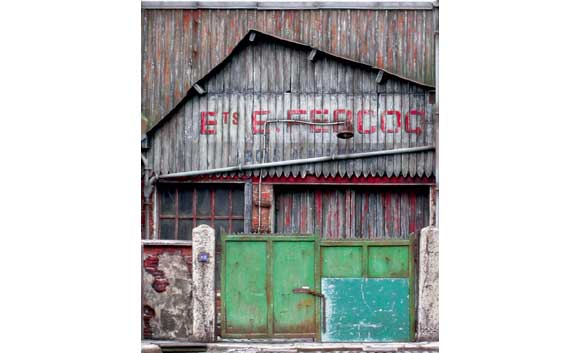
Slightly different doors form part of a dilapidated wooden building in another of the author’s models.
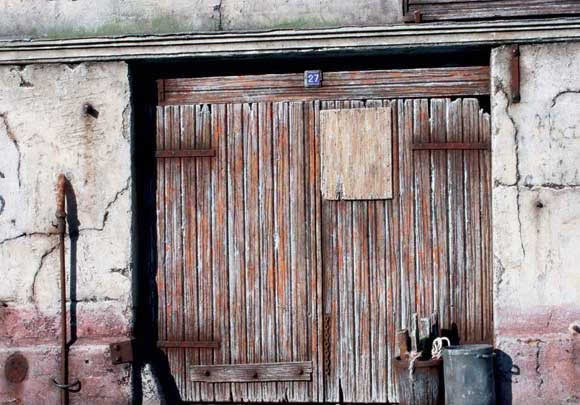
Planked wooden double doors made by the author in one of his buildings. The typically French blue and white enamelled house number plate adds the finishing touch.
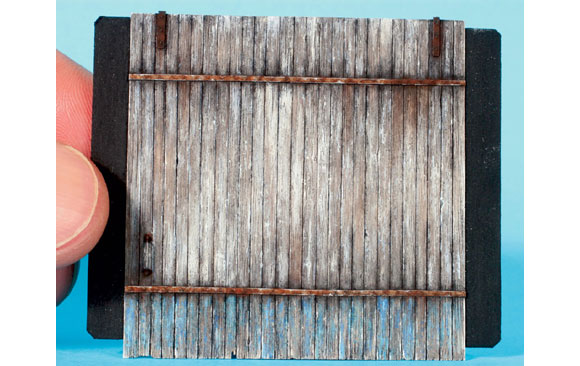
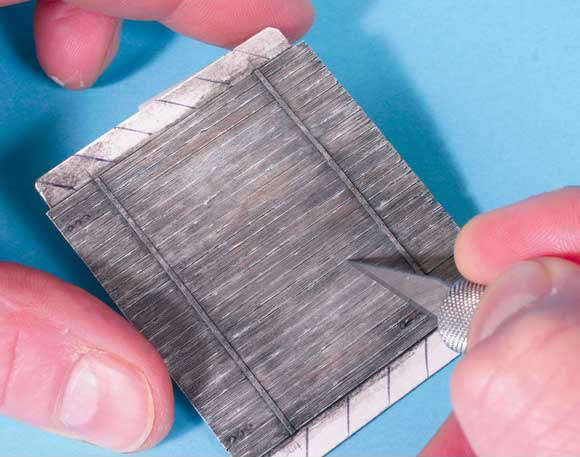
I’ll now show a step-by-step sequence showing the simple method that I use to create weather beaten wood from plastic card and the different techniques employed. I will show how to simulate a simple sliding door with chipped paint on it that I intended to fit on the façade of a garage. Of course, the generic techniques applied here for 1:76 scale could easily be adapted and employed for any other items where wood is found - fences, claddings, etc., and for all scales.
This method when applied to a modest door is a perfect example on which to practice carving, trimming and ageing, provided you want to obtain a rather derelict appearance. Weather-beaten wood is a near endless source of inspiration to depict many effects of decay in scale - washy, worn aspects, chipped paint, etc., in fact to create wood I prefer to use plastic rather than real wood for two main reasons: we are all used to building and painting this material and real wood has its own texture with big fibres and the grain isn’t always suitable for realistic effects.
This method when applied to a modest door is a perfect example on which to practice carving, trimming and ageing, provided you want to obtain a rather derelict appearance. Weather-beaten wood is a near endless source of inspiration to depict many effects of decay in scale - washy, worn aspects, chipped paint, etc., in fact to create wood I prefer to use plastic rather than real wood for two main reasons: we are all used to building and painting this material and real wood has its own texture with big fibres and the grain isn’t always suitable for realistic effects.
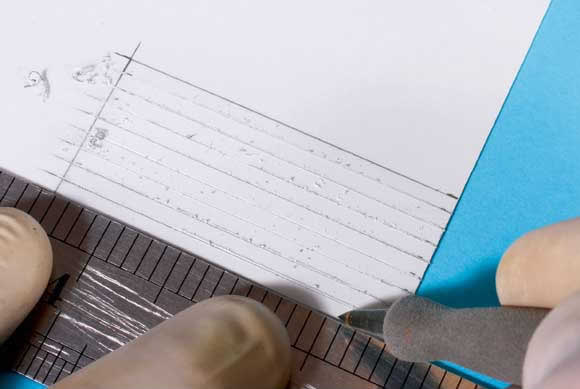
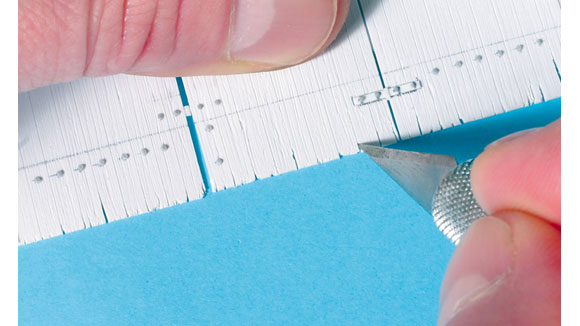
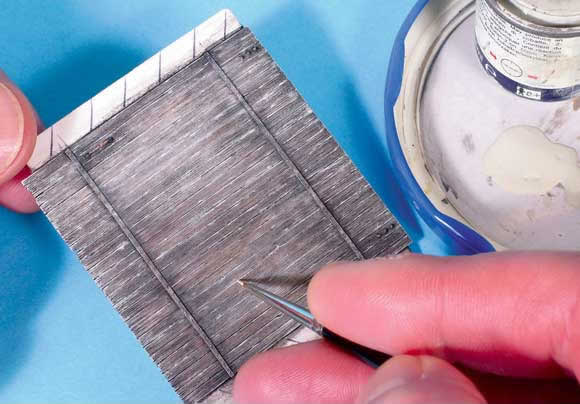
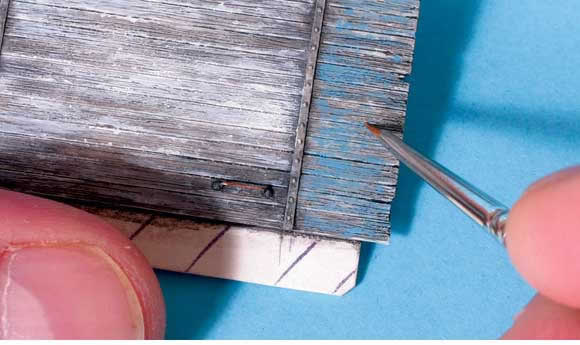
On a 0.75mm thick plastic sheet I first draw the outer full dimensions of the door and then I draw in each plank at 2.5 mm intervals. I then carve each joint with an engraving point, and if you don’t have this tool you can also use your scalpel or modelling knife using the back of the blade to score the plastic sheet.
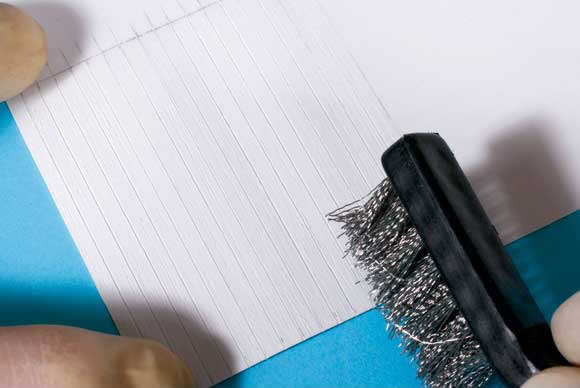
To eliminate the small bits of waste plastic collected in the joints, I pass a fine metallic brush thoroughly over the surface from top to bottom. By doing this, you will not only clear the slots of any excess plastic, but also obtain really fine ‘veins’ representing the open grain of the wood. To reproduce a deeper grain, you can use the engraving point again, and accentuate this effect especially towards the bottom of the planks.
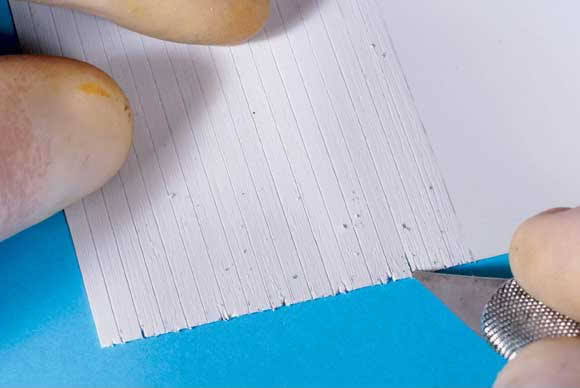
To break the glowing aspect and impart some ‘life’ to the door, I first perform some incisions on the lower part of the door with the back of the scalpel blade. Then to add more realism, some joints between the planks are deeply engraved. The more you do the more the door will seem old and well used.
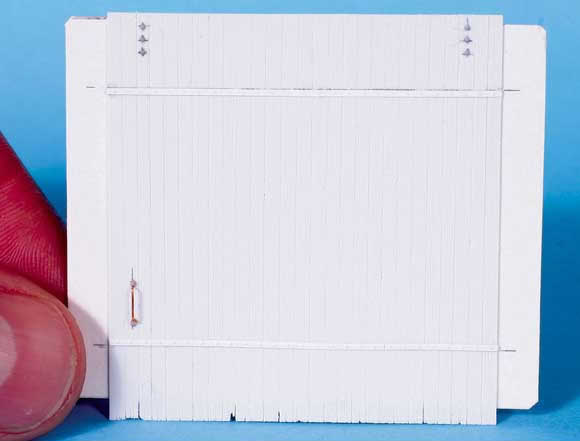
The wood is ready and it’s time to add the details using Grandt Line nuts, 0.12mm thick styrene sheet and a thread of copper to simulate the handle. The door itself is stuck onto a larger piece of plastic sheet so that it will be easier to fit it inside the opening of the façade.
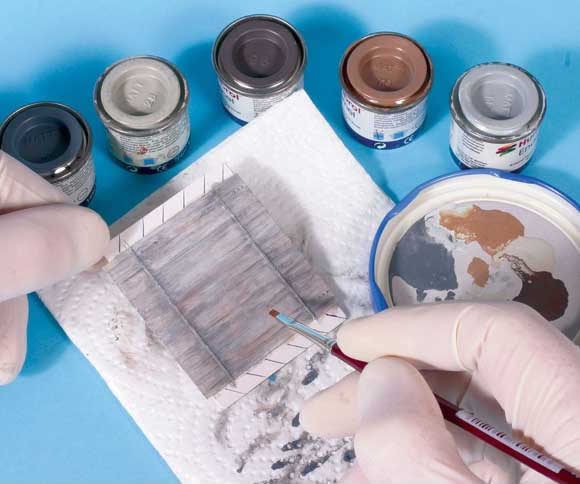
The door is given some basic ‘wishywashy’ thinned coats of ‘wood’ colours, fading to grey. This first painting step calls for enamel paints, much diluted with mineral spirit so not to overfill the grain. For this phase, I use five colours from the Humbrol enamels range: Light Grey 147/Light Earth 119/Chocolate 98/Camouflage Grey 28/Sea Grey27. These shades are applied in no particular order with a No.2 Brush working from top to bottom and blending to obtain interwoven shades.
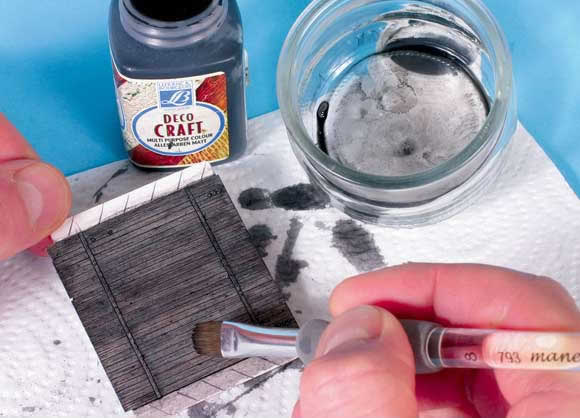
When the paint has completely dried, a wash of black acrylic paint is applied to the surface. At the first, it will appear to negate the previous painting step, but as soon as this wash is dry it will emphasize the grain and the joints.
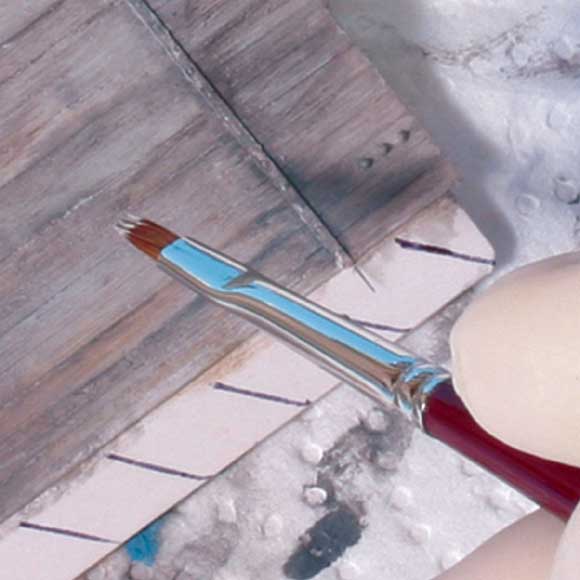
Now it’s time for some tricky operations. I first ‘mark’ some raised lines between the joints and the worn areas by scraping the paint carefully with the point of a blade. When it’s done, I underline these very small parts with Humbrol Camouflage Grey 28 deposited in minute quantities with a No.0 brush.
The previously applied white and blue paint (this is on the lower part of the door) is simulated by randomly applying larger irregular areas with a No.1 brush and working patiently along the grain. When the paint is dry, I rework each plank with minute touches of the same paint, but this time with a No.0 brush, working from inspiration in accord with the desired result.
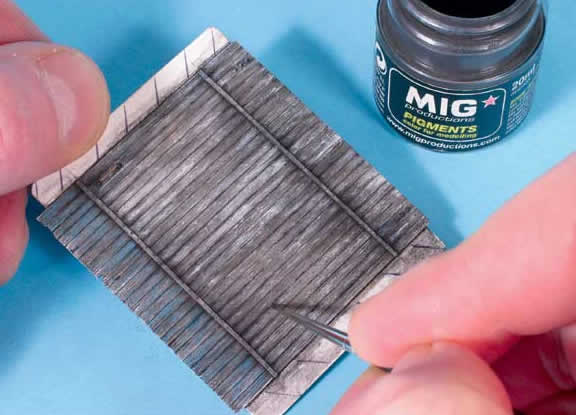
After this long micro-painting step, I rework some of the shadows of the joints to accentuate them and make them a little darker. Several methods can be used, but I personally use dry black pigments applied with a very fine old brush that I keep only for this work. The powder is deposited in minute quantities in the joints and then brushed down.
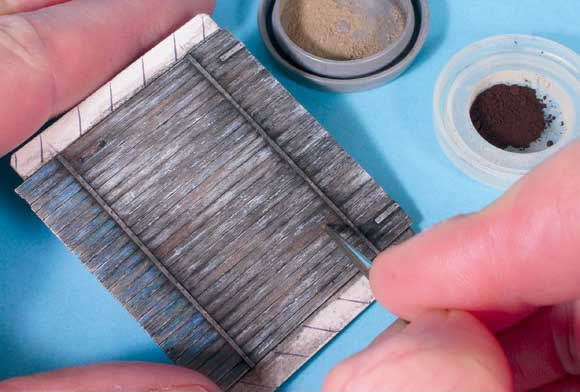
According to the result I require I introduce more variations in the shades of the planks by dry-brushing them with different ochre coloured pigments. To further enhance the finish of wooden parts, I simulate the odd rotten plank on the bottom of the door by applying some light and dark green pigments with the same fine old brush. This will also bring out the patient trimming work done previously.
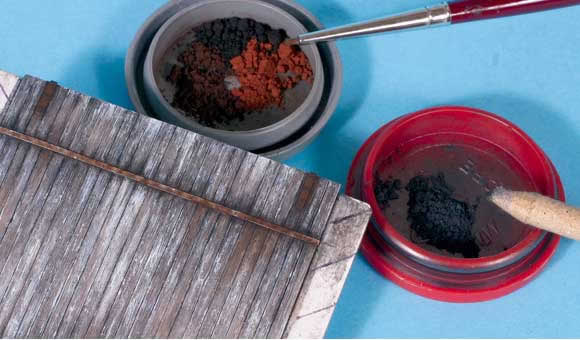
To ‘rust’ the metallic parts and reproduce the corroded details I first apply a coat of Humbrol Chocolate 98. After a minute or so, I then dab the wet surface with different rust pigments to obtain a texture as realistic as is possible in 1:76 scale. I finally use some graphite powder to underline and give a metallic appearance to the handle.
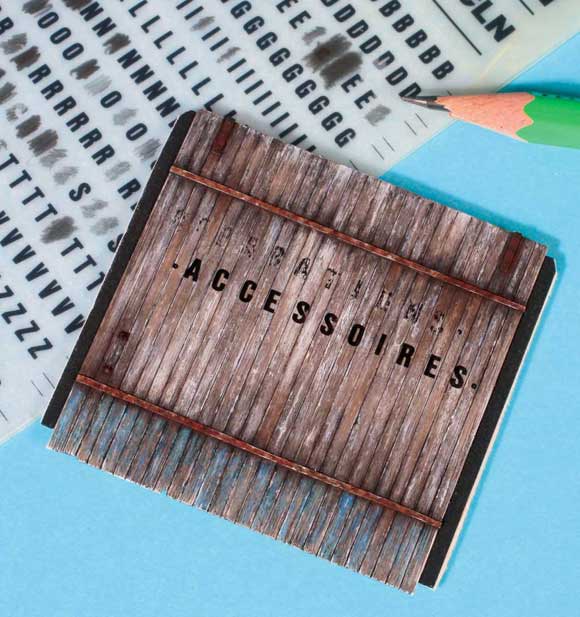
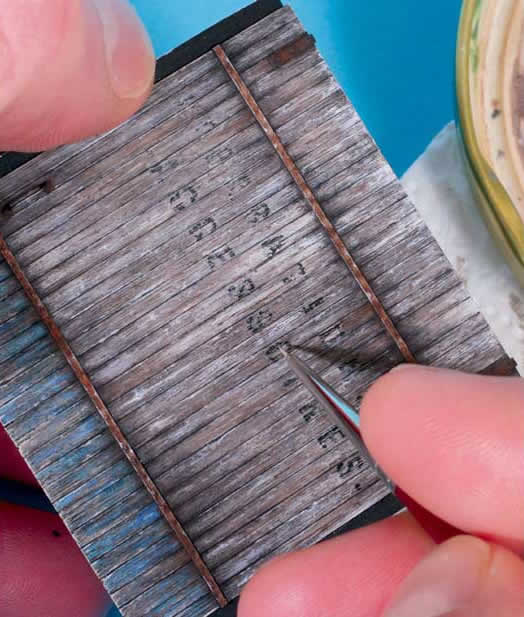
As I wanted to reproduce old lettering that had been erased from the door (accessories for motors, reparations, etc.,), I used old dry rub down transfer letters that match the result I’m looking for. After having applied them with a graphite pencil, they are inlaid as much as possible into the grain with an old brush with its hairs shortened.
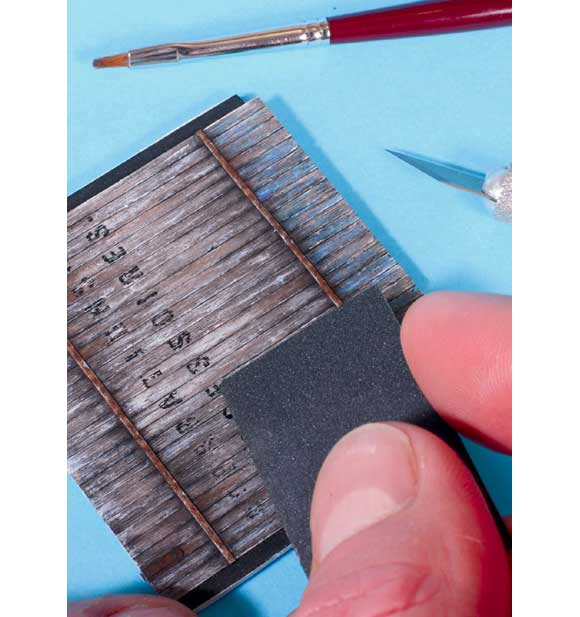
The lettering is lightly rubbed with a small sheet of very fine sandpaper, once again working down and following the grain. Next I used the back of the blade of the scalpel to emphasize the areas where the lettering is more shaded and also to vary its aged appearance.
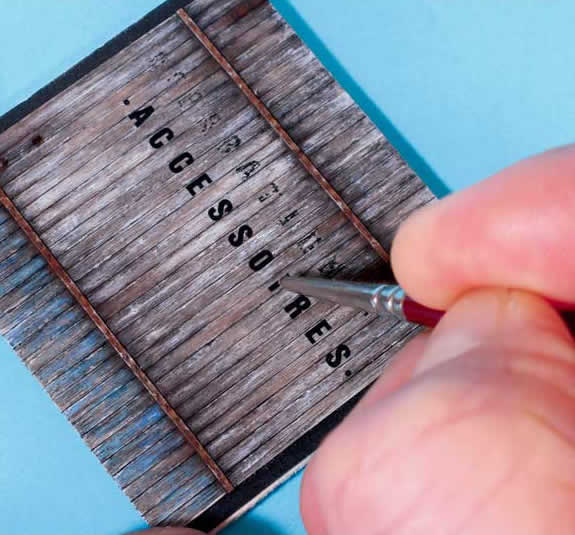
I again revert to the micro-painting process to complete the previous stages and here I use four shades of acrylic paints (Chocolate Brown, Leather Brown, Ivory and Stone Grey) alternately to improve the scale and almost erased appearance of the door’s inscriptions.
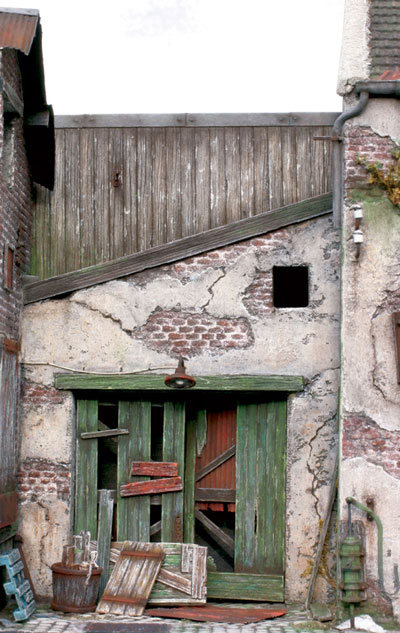
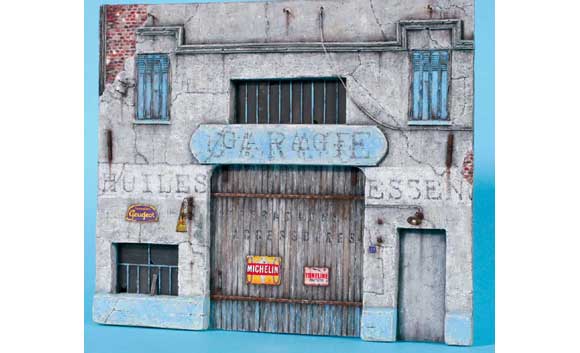
To give a typically French appearance to the door, different and very evocative miniature tin plate commercial signs are fitted after having been lightly corroded on their edges with Shaded Earth acrylic paint and rust pigments. The door is now ready for fitting into the façade of the garage I created with feather boarding and coating, but that is another story...
Making bricks in small scale modelling
|
To explain this generic technique, I will use as an example building the small façade of a house that I needed for my northern French street in 1:72 scale. Lets see how to proceed using a step-by-step sequence.
Step 1
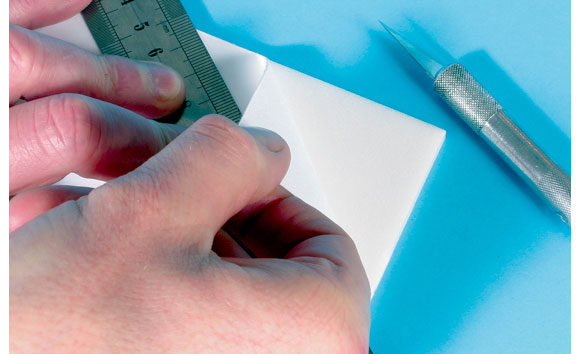
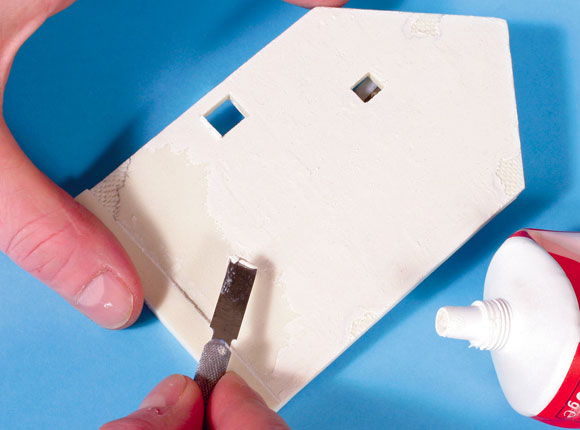
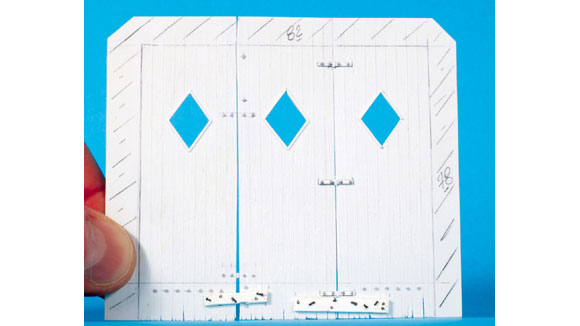
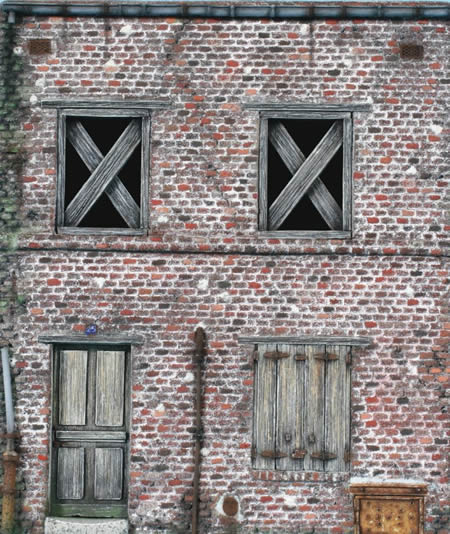
The positions of windows and doors are drawn on very precisely and their openings are lightly incised with a scalpel. Hold the sheet firmly with a metal rule and then peel off the cardboard.
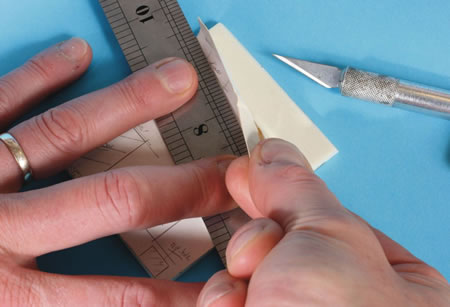
The first step is to cut the façade out of 5mm feather board with a sharp scalpel blade. The positions of windows and doors are drawn on very precisely and their openings are lightly incised using the scalpel. Once its done, the feather board is ready to be peeled off from the side to be embossed by slipping the sharpened blade between the cardboard and the foam at one of the corners. I hold the sheet firmly with a large metal rule and then take off the cardboard avoiding any possibility of the foam being torn away.
Step 2
Step 2
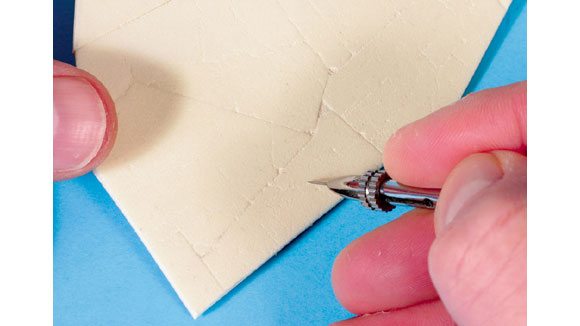
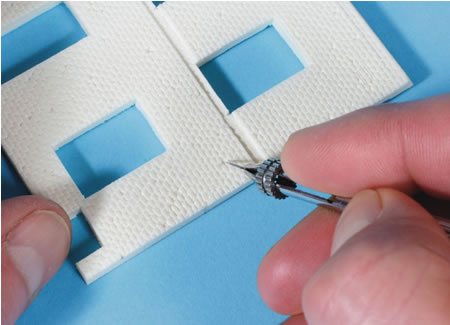
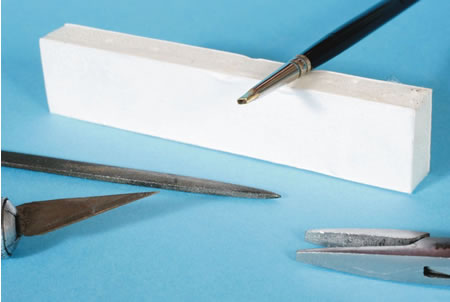 Create a punch matrix the size of a single brick, to emboss the surface in the foam, from an old paintbrush.
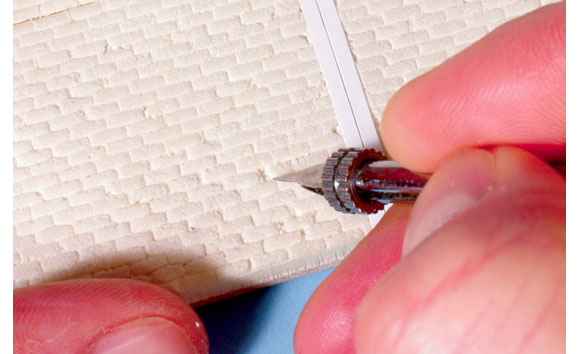
The second step is to create a punch matrix the size of a single brick, to emboss the surface in the foam. For forming 1:72 scale bricks such an embossing tool can easily be produced from an old fine No.3 brush with no more bristles left. Once the ferule has been hollowed out, the edge of its open extremity is shaped to the size of brick required with a pair of small pliers and later refined and sharpened with a flat file to obtain a perfect rectangle.
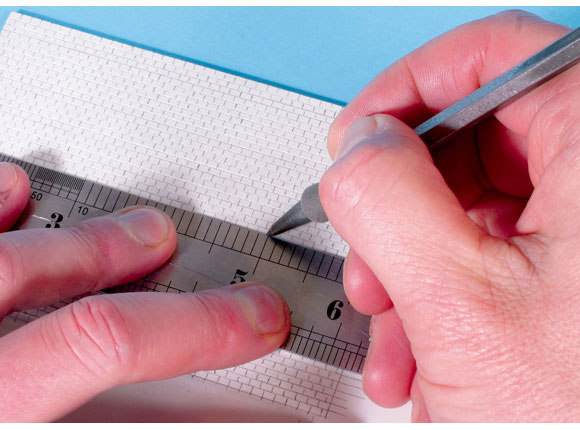
Step 3
Step 3
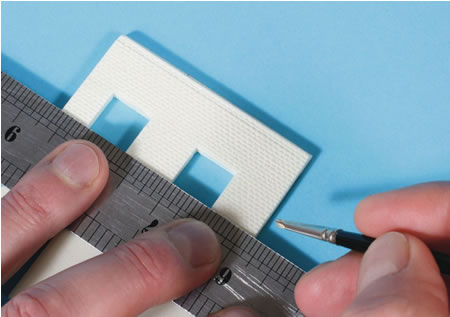
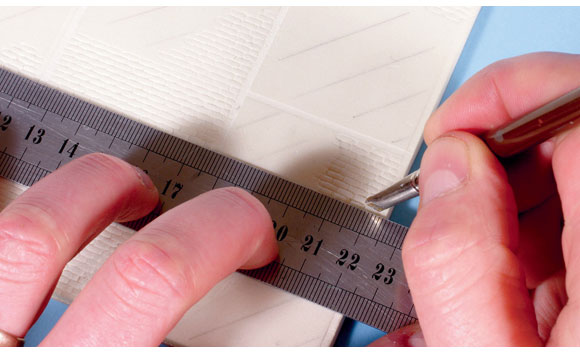
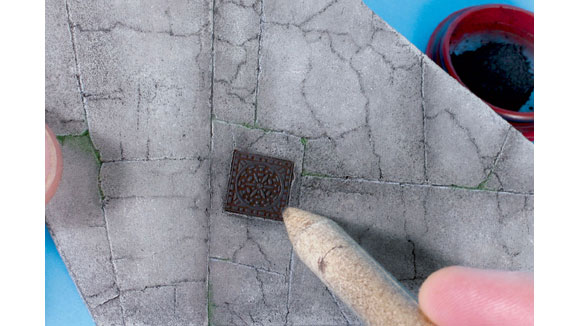
Embossing the bricks in a staggered way using a metal rule as guide for the embossing tool. Missing bricks or fissures can be simulated with a refined needle.
Embossing the bricks can begin first without applying too much pressure into the foam. It is best done in a staggered way using the metal rule as guide for the embossing tool. To give a more realistic aspect you can stamp deeper into the foam to create eroded joints in the brickworks mortar in some places, and carve off missing bricks or simulate fissures. These tricky operations in 1:72 scale can be made with a refined point of a needle.
Step 4
Step 4
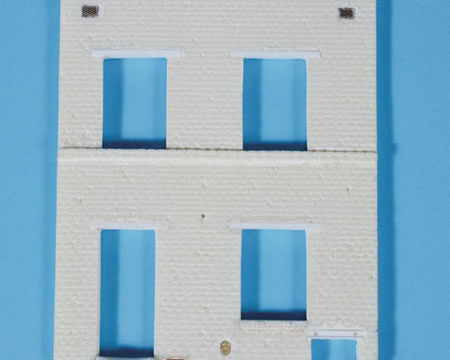
The façade is ready for painting and fittings like shutters, gutters, down pipes; air hole bricks, grilles and doors were scratch built using styrene, brass tube and copper wire.

The items that can be painted when the façade is treated can now be done; for example, wooden and metal lintels, and other small details. At the same time such fittings as shutters, gutters, down pipes; air hole bricks, grilles and doors are scratch built using styrene, brass tube and copper wire.
Step 5
Step 5
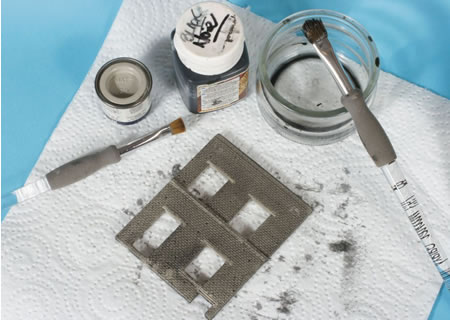
Two coats of Humbrol Camouflage Grey 28 were applied with a wide brush ensuring this gets into all the recesses. The foam is porous and the primer coat will be fully absorbed by it, so a second coat is necessary. Polish the surface with 400-grade paper to give the bricks a scale texture and carefully wipe off the dust from the recesses with a soft wide brush
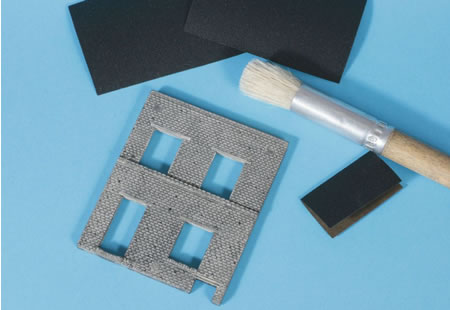
For the first painting phase I applied two coats of Humbrol Camouflage Grey 28 with a wide brush ensuring distribution in all the recesses. The foam is porous and the primer coat will be fully absorbed by it, so a second coat is imperative. When all is dry, a generous overall wash of acrylic matt black is applied. After 48 hours, the foam is tough enough to be gently sanded with 400-grade paper. This is done to polish the surface and give the bricks a texture true to scale. Carefully wipe off the dust from the recesses with a soft wide brush.
Step 6
Step 6
The brickwork is painted with a wide brush and near dry paint on its bristles; much like a quick dry brushing
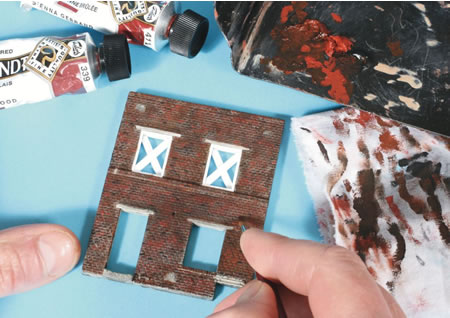
The brickwork is painted with a wide brush and near dry paint, much like a quick dry brushing. I use acrylic paints by Talens, mainly two shades of red - Burnt Sienna 411 and English Red 339, mixed with matt black or simply just these two colours in various mixes on some random bricks to reproduce the many varied colours of real bricks.
Step 7
Step 7
The mortar courses between the bricks are simulated using white pigments applied overall, onto the surface of the bricks with an old, wide brush.
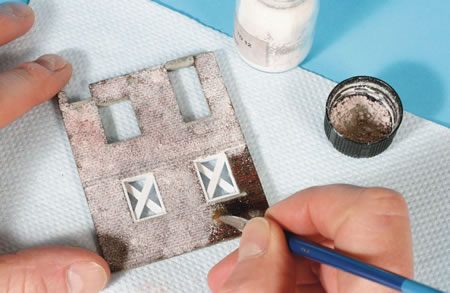
When it's all dry it's time to turn to the mortar courses between the bricks. (Pointing). These are simulated using white pigments applied overall onto the surface of the bricks with an old wide brush. After the excess pigment has been blown out, the remaining can be embedded into the joins with just your fingers. The bricks now appearing in relief are cleaned with a slightly dampened rag to remove excess pigment.
Step 8
Step 8
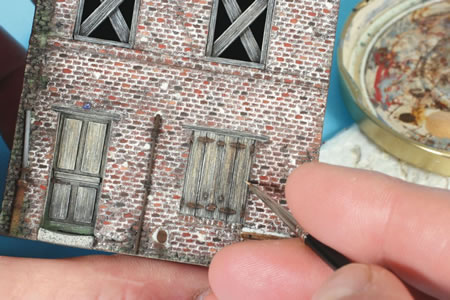
More shades of colour were given to random selected individual bricks with a fine No.2 size brush.
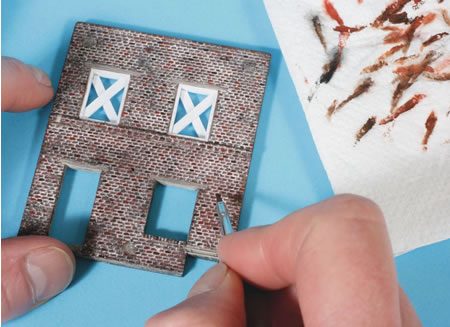
This step will give infinitely more shades to the bricks and give them a definitive appearance. I re-use the paints I first employed in Step 6, but this time applied alternatively on each brick with a fine No.2 size brush.
Step 9
Step 9
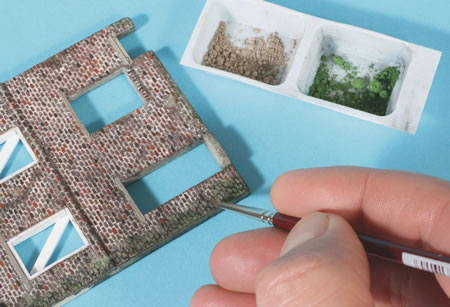
Use the three-step sequence referred to in the text for the last phase creating the places where rainwater or humidity has eroded the mortar courses and given the bricks a greenish aspect.
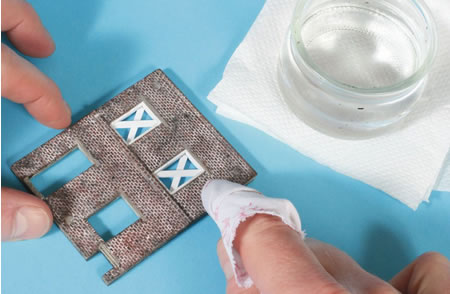
The last phase concerning the brickwork itself is to create the places where rainwater or humidity has eroded the mortar in the courses and given the bricks a greenish aspect. There are three easy steps necessary to reproduce this ageing effect.
1. Apply black pigments into the mortar courses with a fine No.0 brush.
2. Apply light green pigments on the appropriate surfaces.
3. Blow off the excess of powder and brush Sienna Earth coloured pigments onto the raised parts of the bricks.
1. Apply black pigments into the mortar courses with a fine No.0 brush.
2. Apply light green pigments on the appropriate surfaces.
3. Blow off the excess of powder and brush Sienna Earth coloured pigments onto the raised parts of the bricks.
Step 10
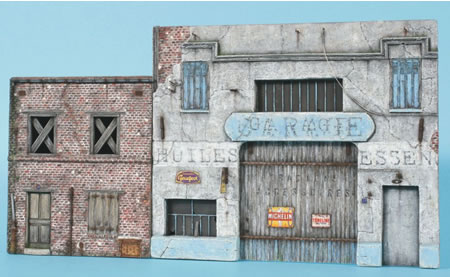
A realistic old touch was given to the brick-built house and its derelict upper storey with boarded windows. For some idea how it would look in a row of buildings I displayed it near the façade of a garage I'd built earlier.
I finally enhanced the façade by painting and ageing the final details I'd added using a micro painting technique, which gives a realistic old touch to this brick built house.
Now all it needs is a roof, a chimney and so on...
Now all it needs is a roof, a chimney and so on...


No comments:
Post a Comment